Our new and improved WooCommerce plugin is here, and it gives you far more control over how and when you offer payment plans on your store. Here are the highlights. The setup guide covers every option in detail and goes deeper.
Different payment plans for different products
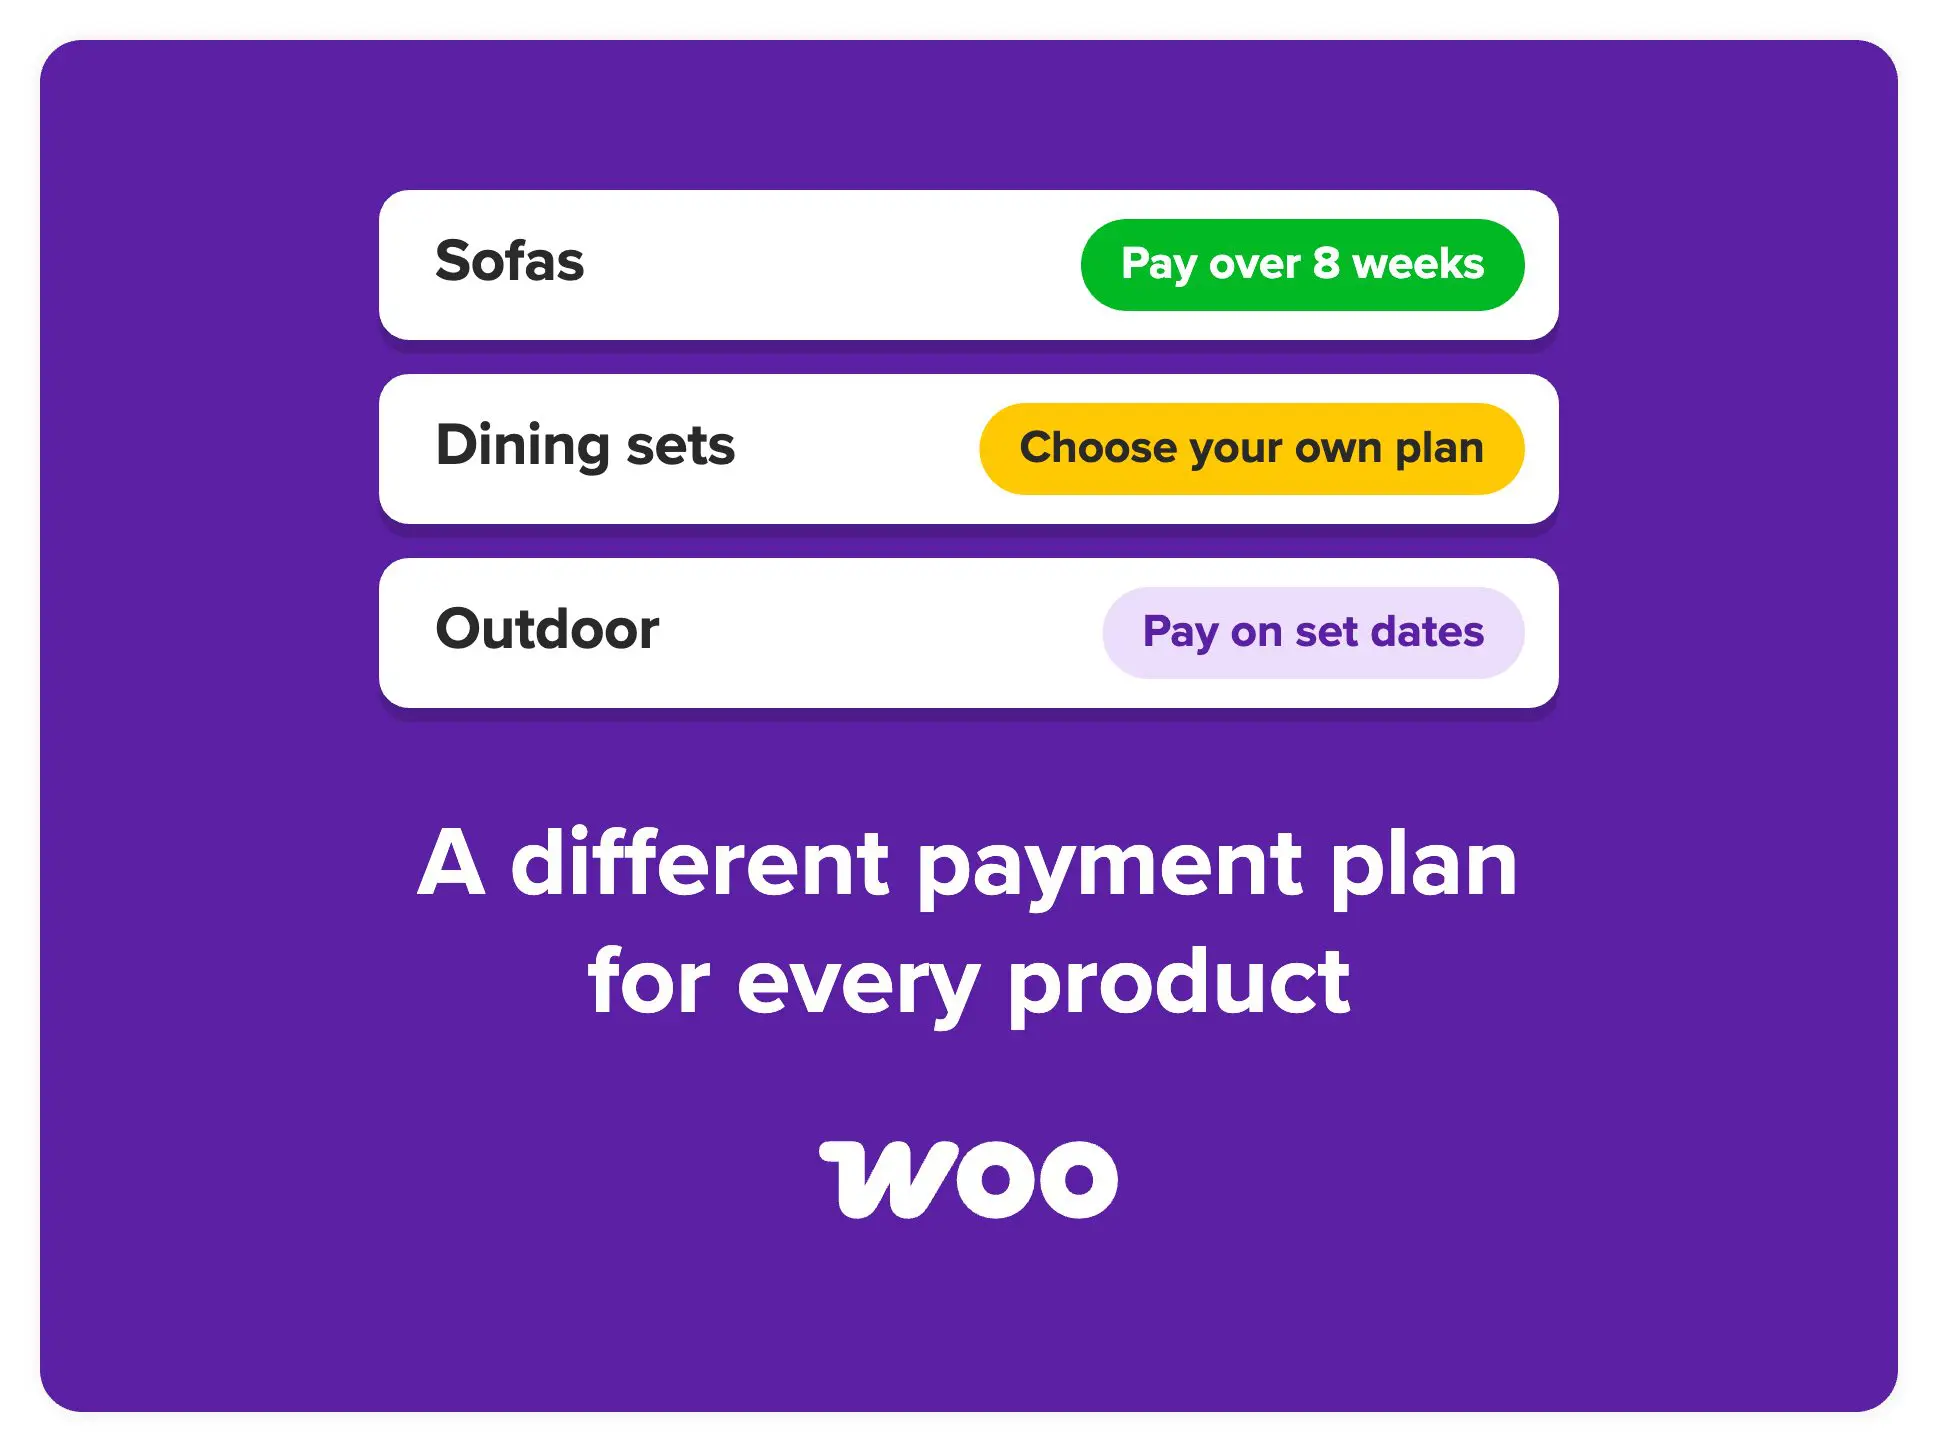
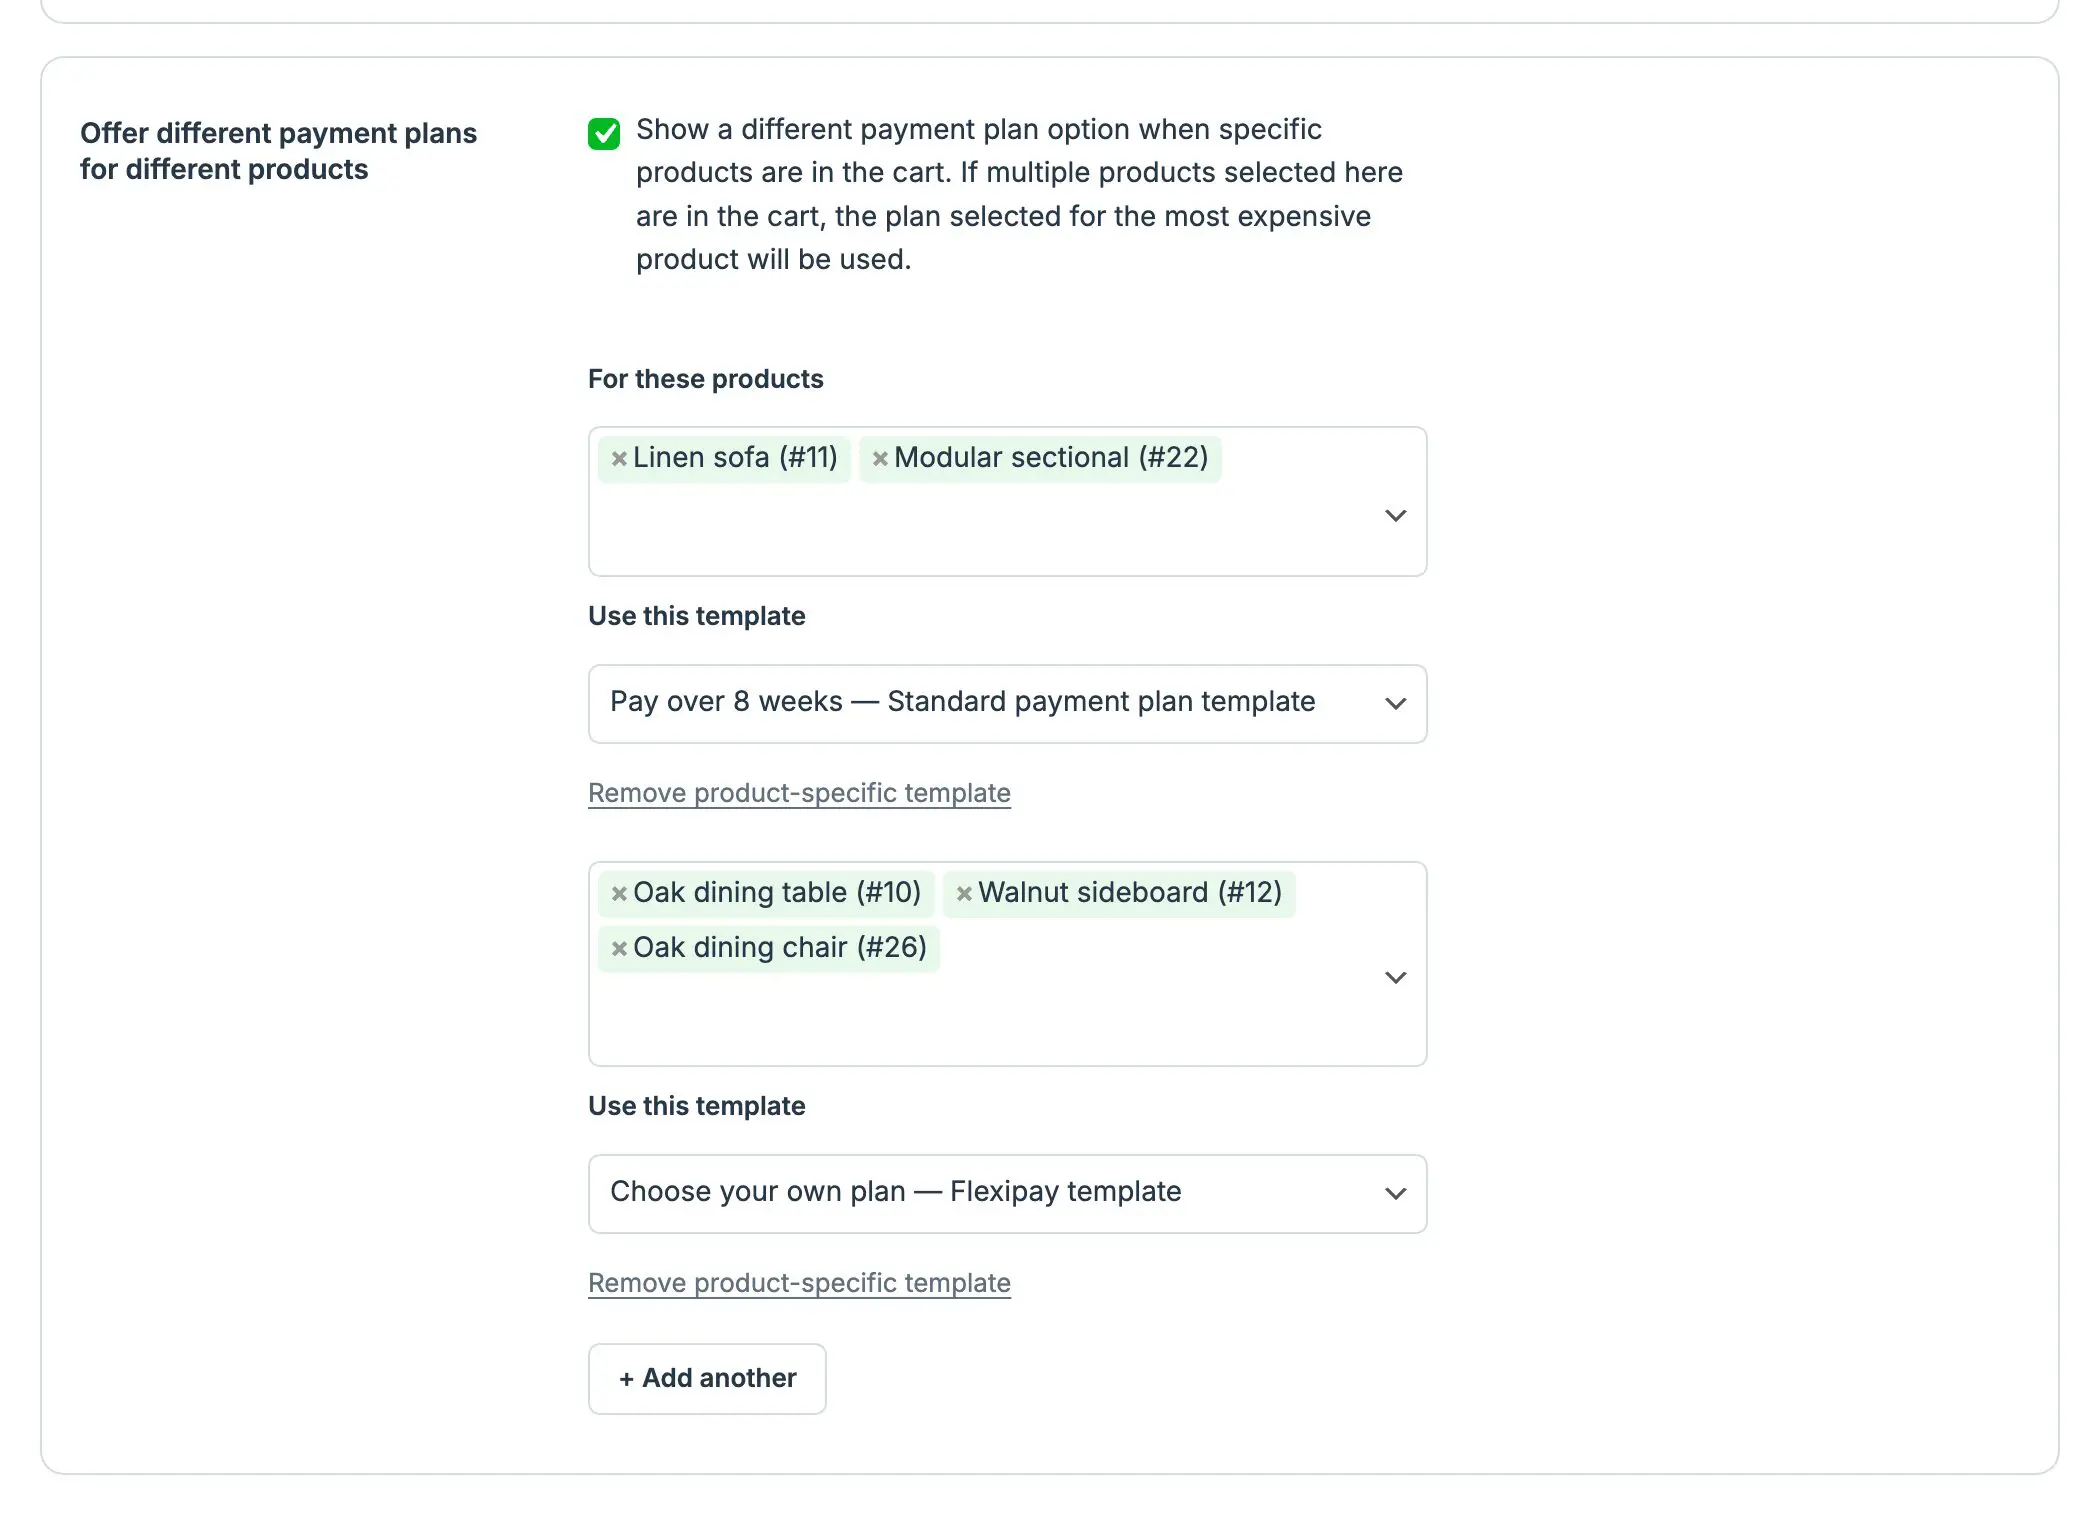
Offer a fixed 8 week plan on your sofas and let customers build their own plan on dining sets. Turn on Offer different payment plans for different products, pick the products, then choose the template to use for them. Click + Add another for as many product groups as you need.
If products from more than one group are in the cart, the plan for the most expensive product is used.
Choose the products, variants and quantities that offer a plan
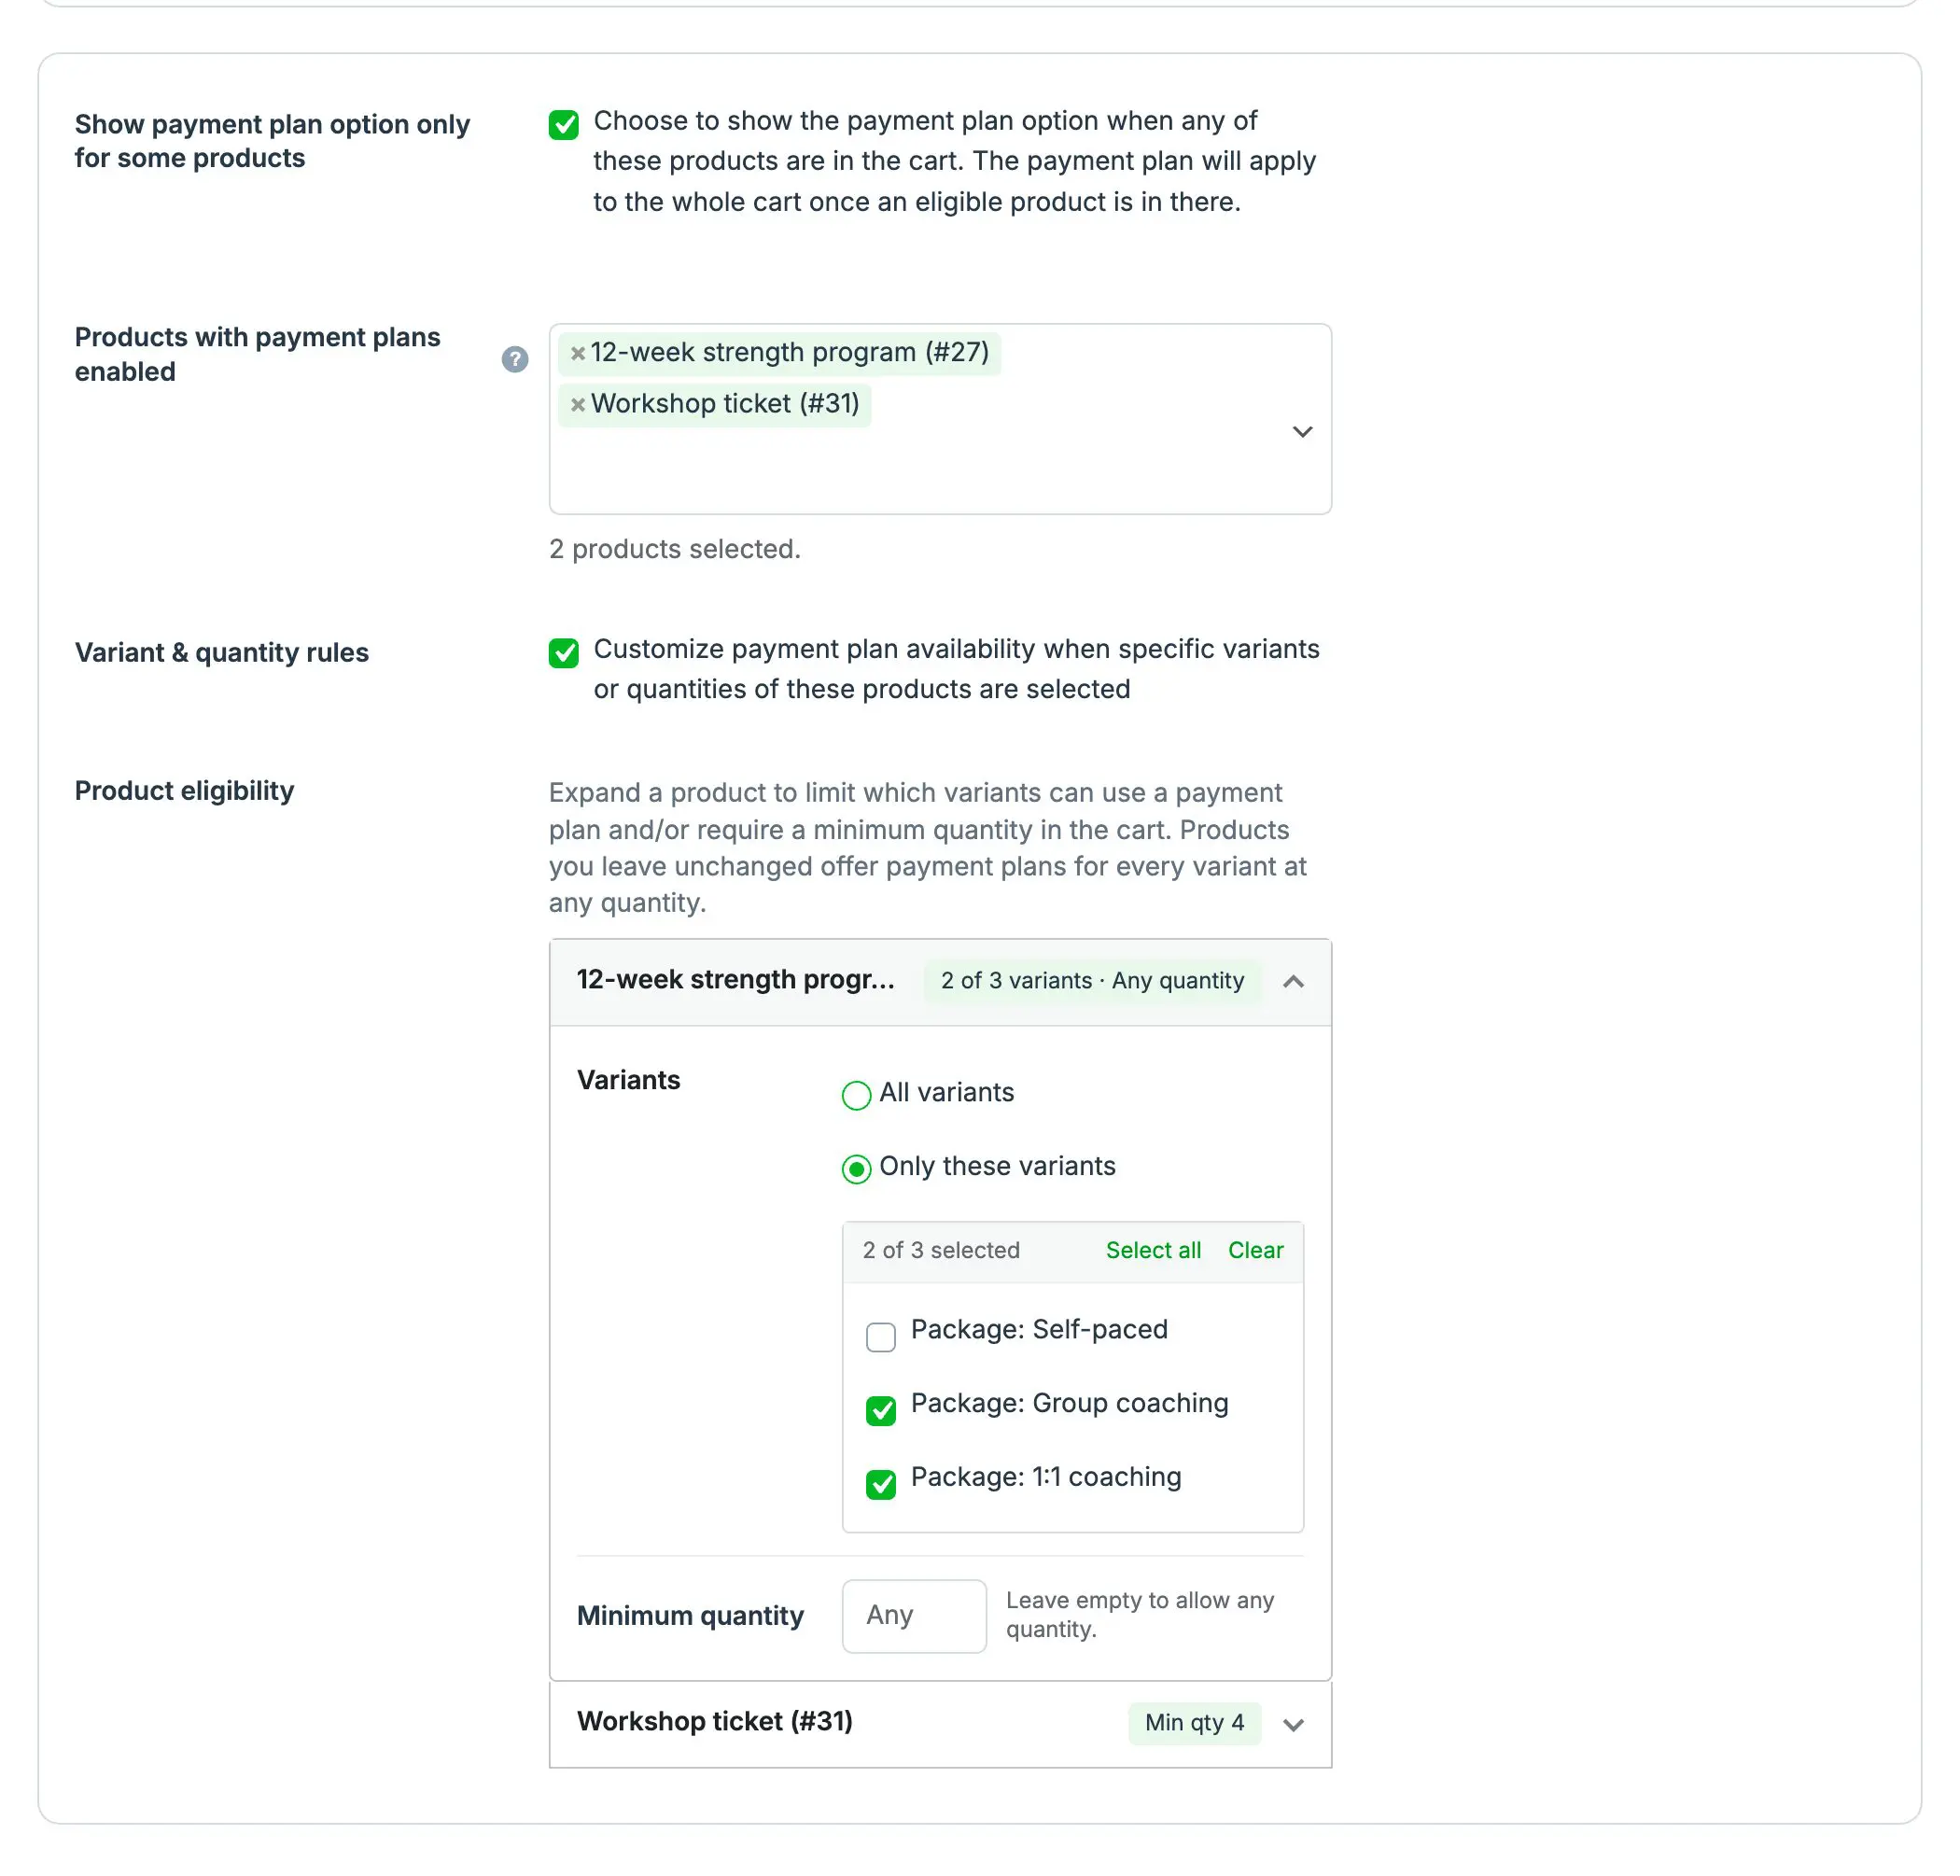
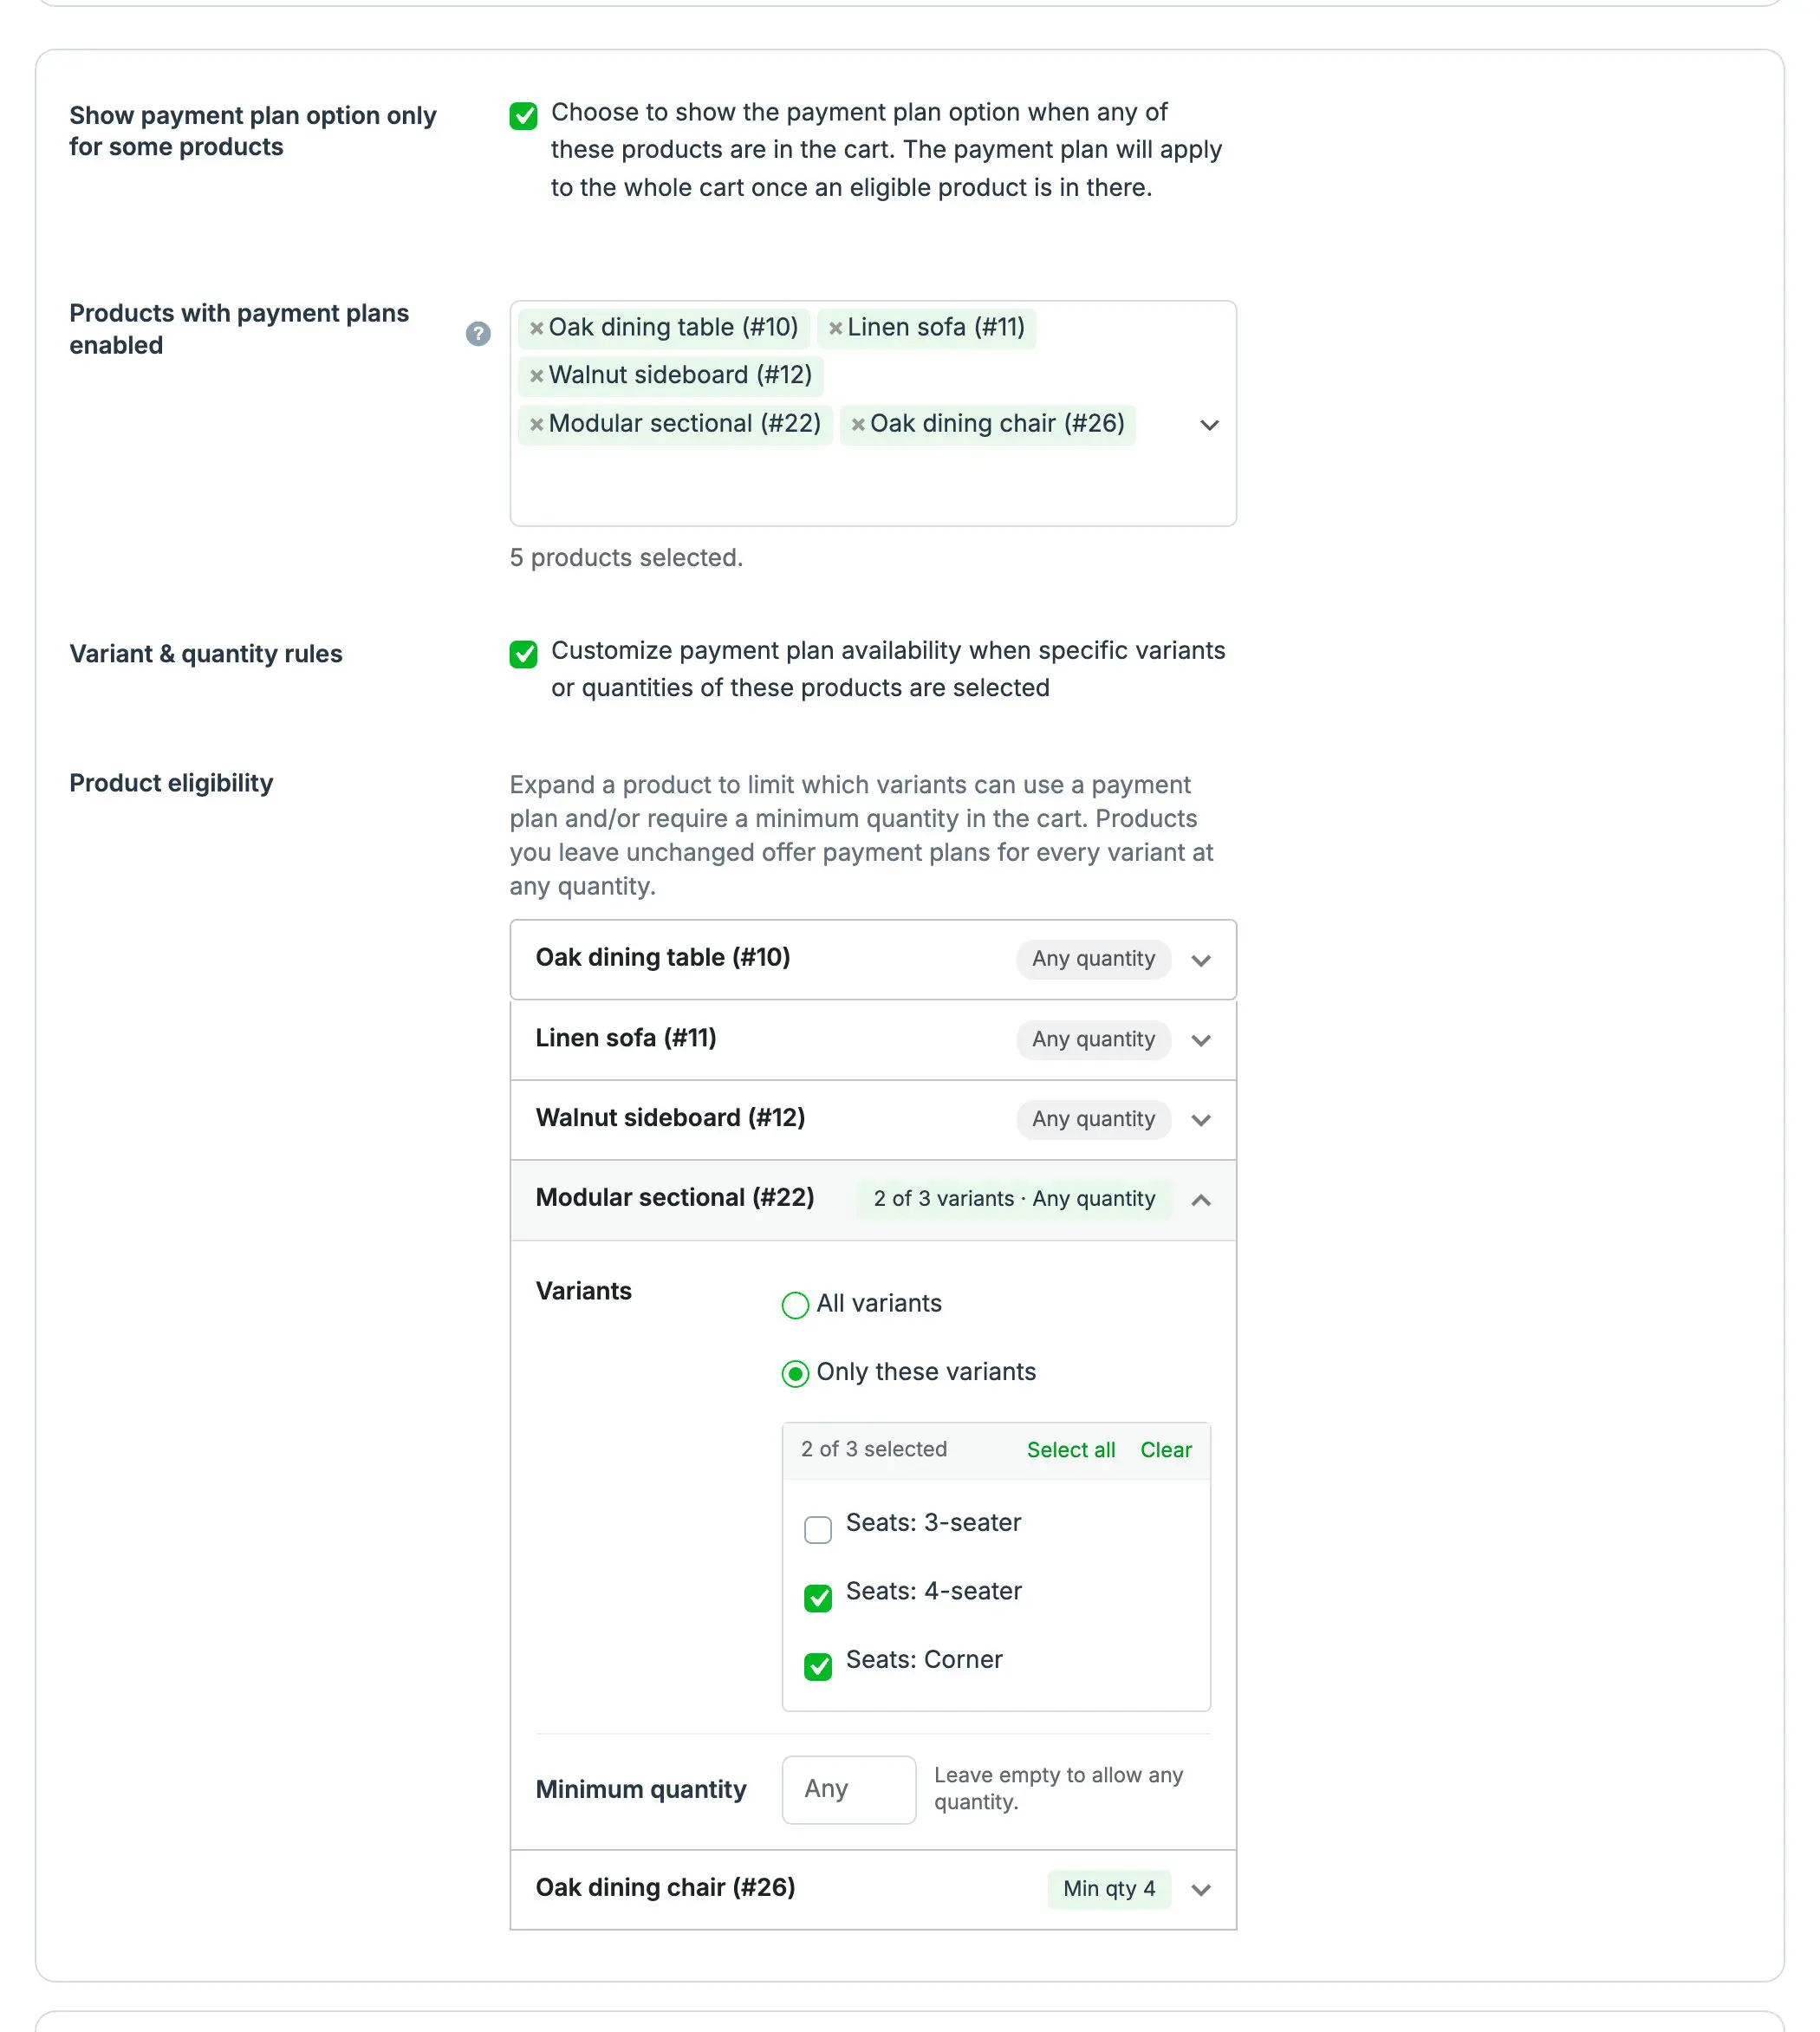
Want payment plans on some products only? Pick them from a searchable list on the settings page. The payment plan option shows as soon as one of them is in the cart, and covers the whole cart.
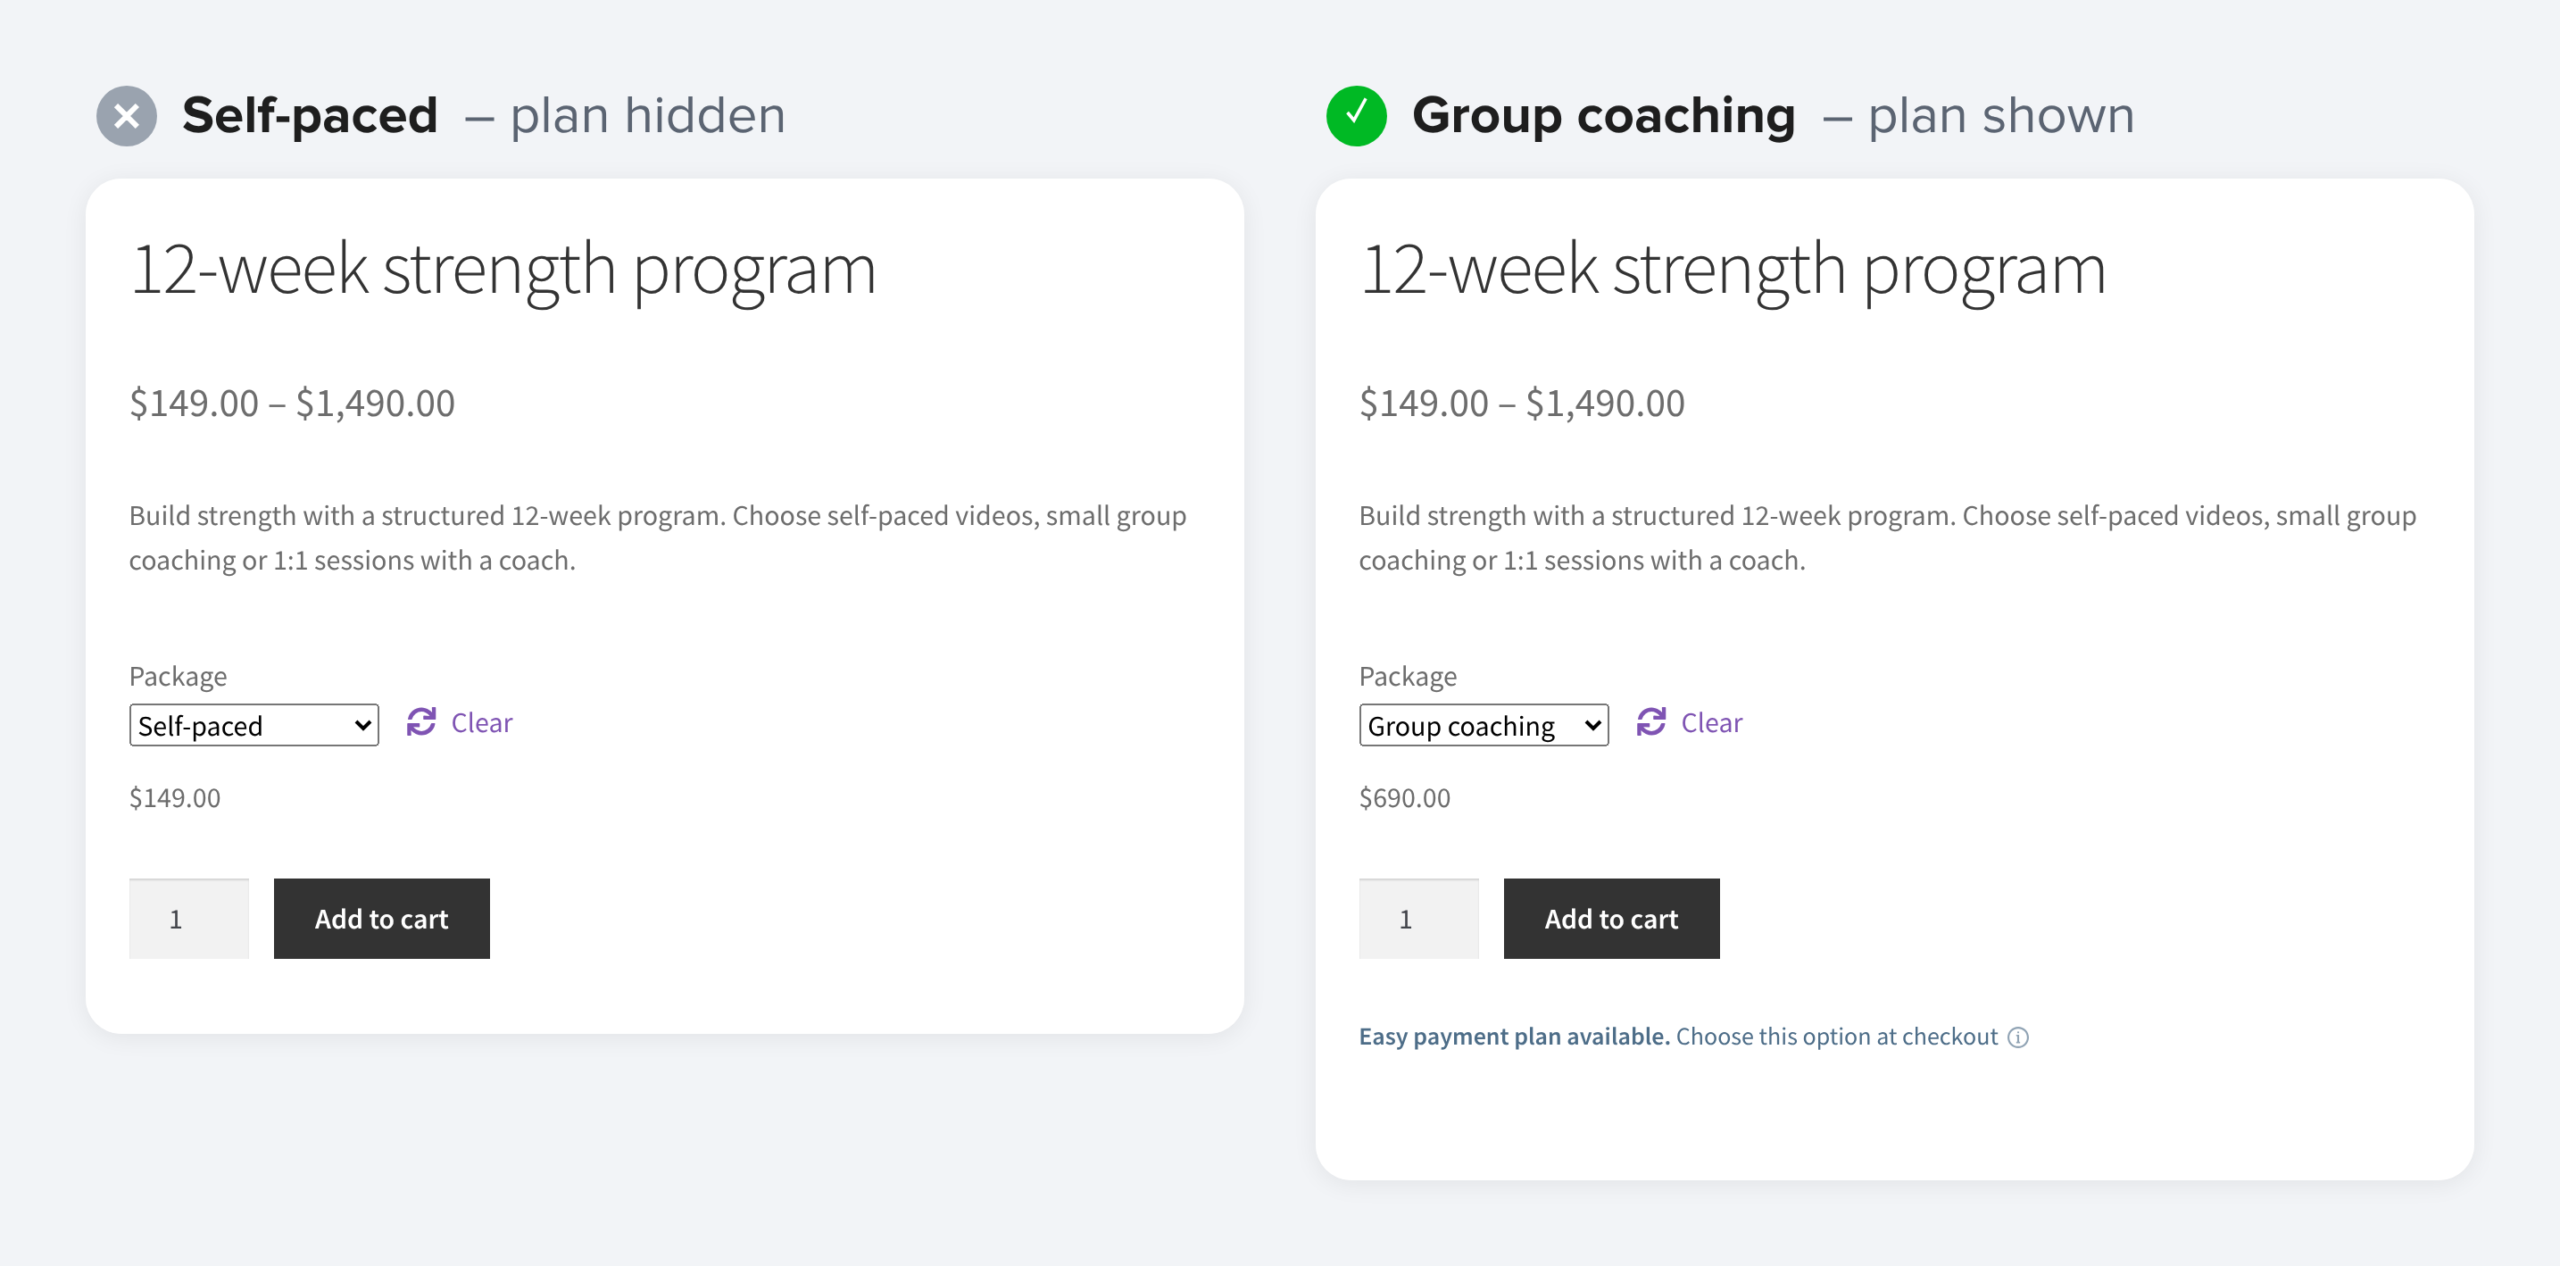
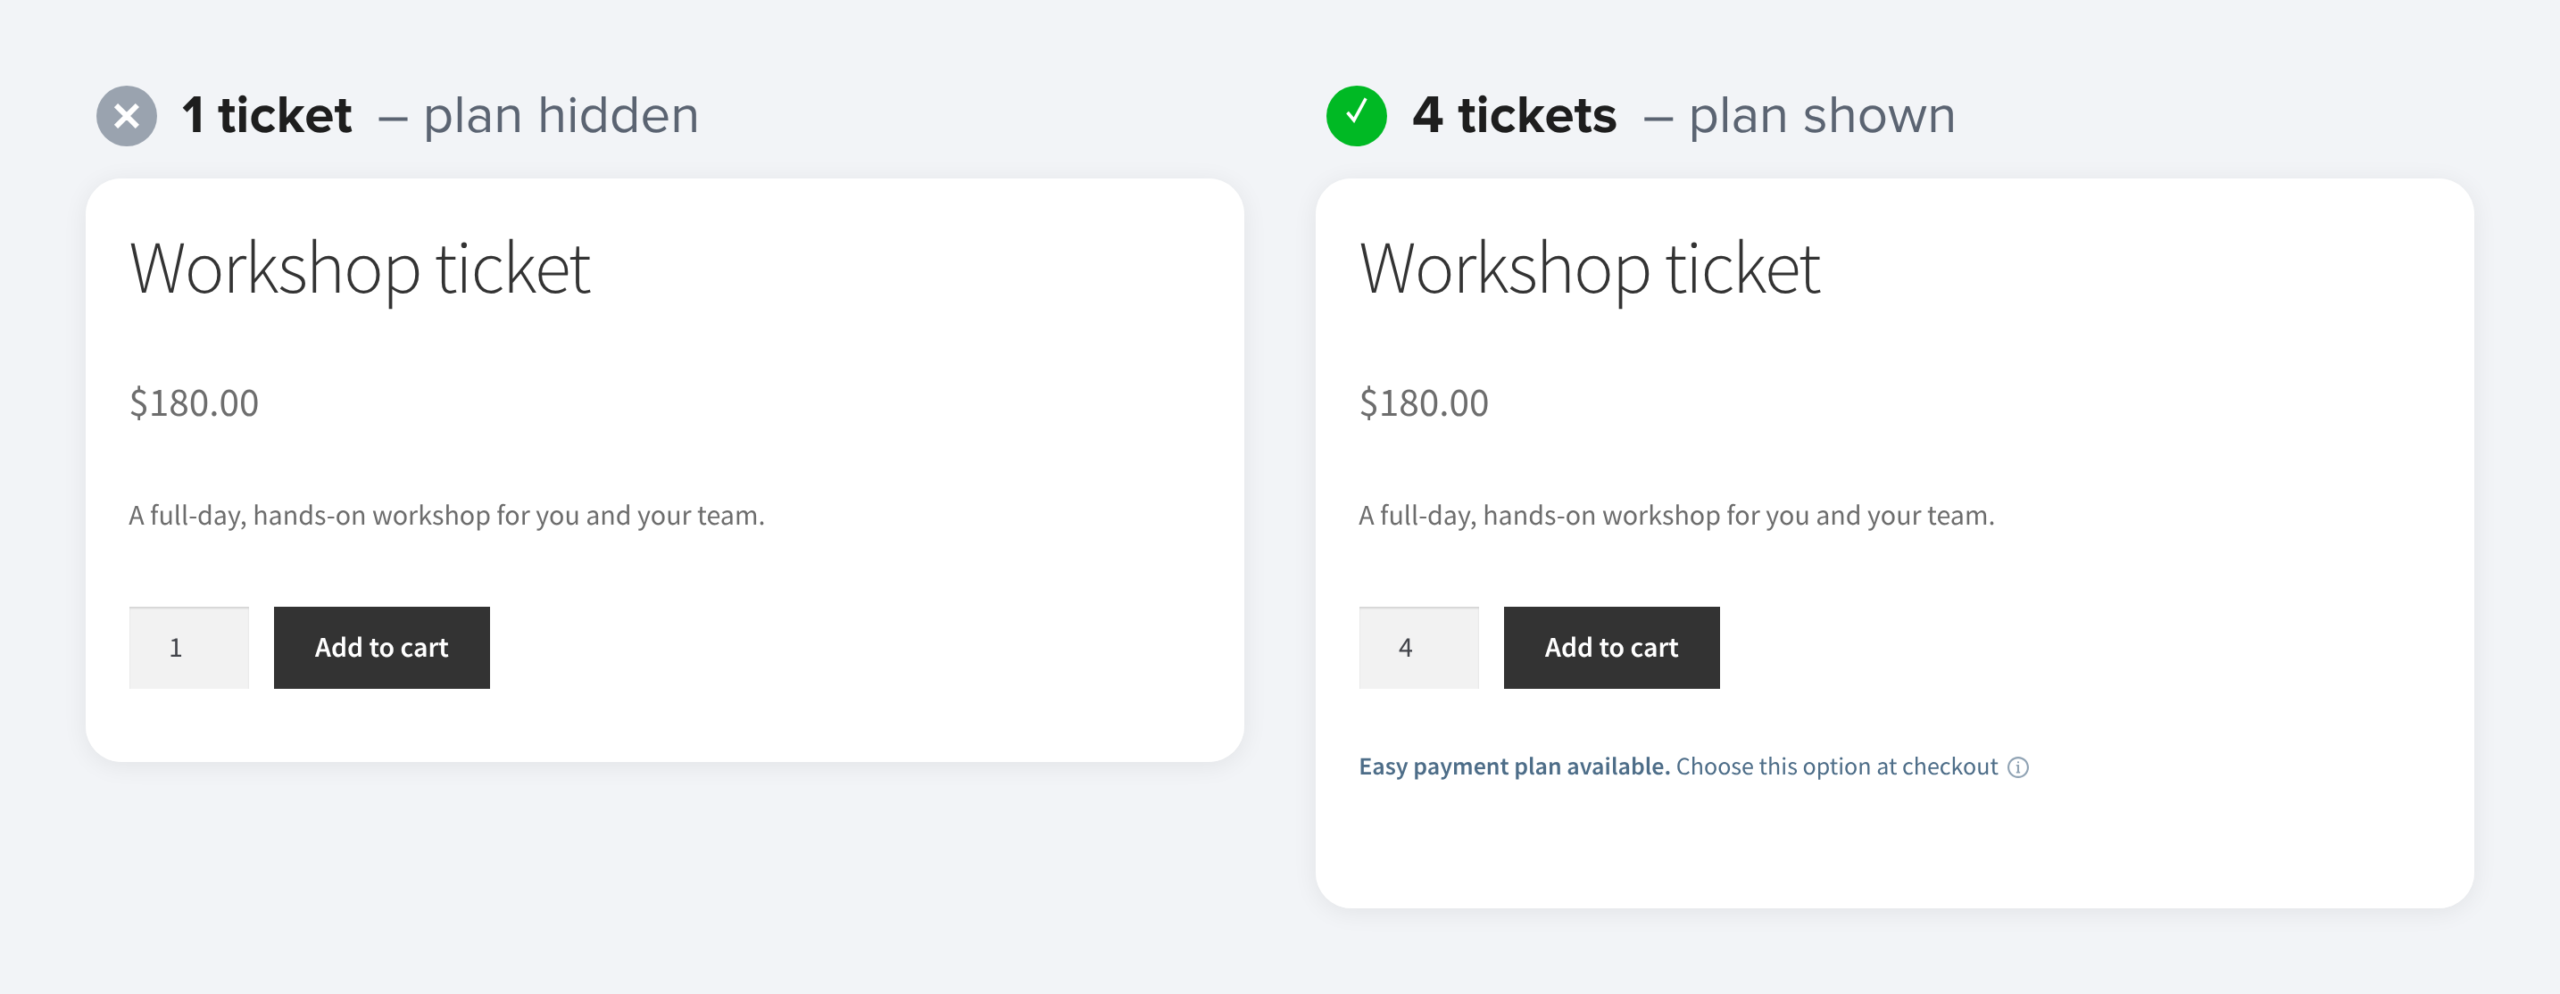
For even more fine-grained control, you can now also show the payment plan option for certain variations or quantities of products. Want to offer a payment plan only when someone buys 10 or more of something? Payment plan only when someone buys the in-person course vs. online? Different rules for different products? You can now have it all.
And instead of having to go to each product and edit settings there, you manage all the rules directly via the Paythen plugin settings.
Use any Paythen template, including Flexipay, our most versatile plan
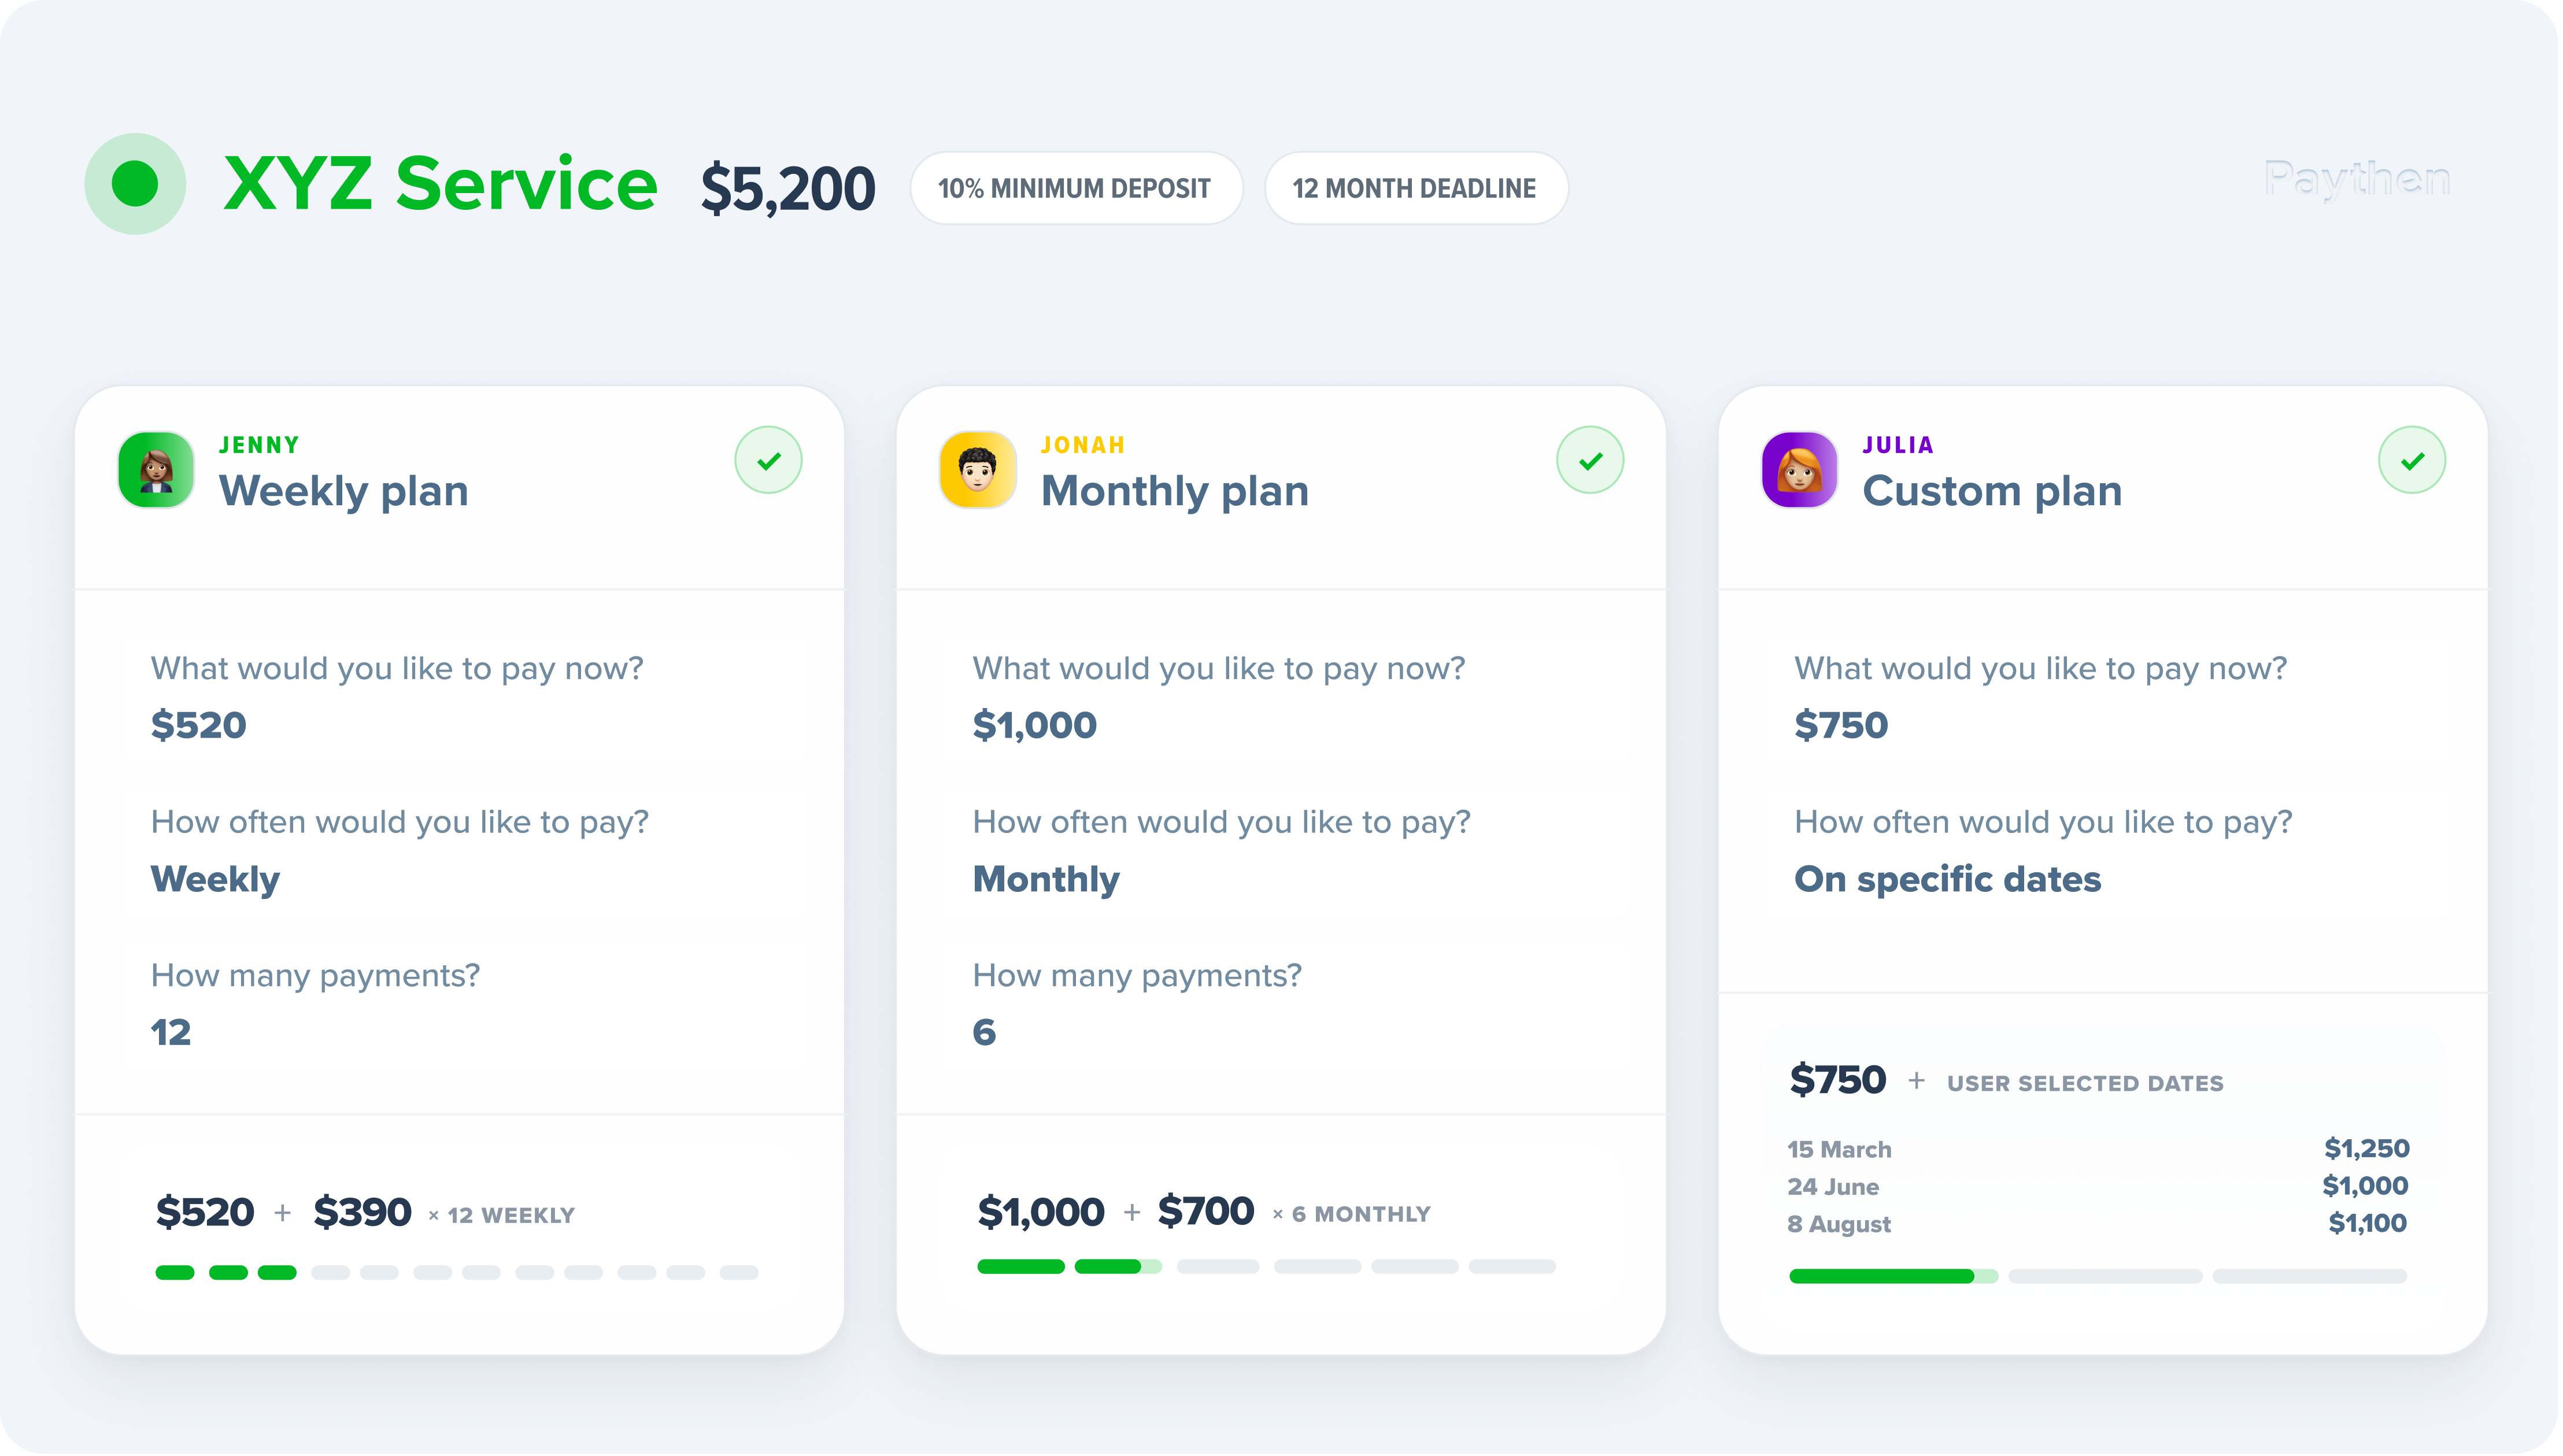
Every template field is now an always up-to-date dropdown of the templates in your Paythen account: classic payment plans, date-based, flexipay and wait for it (modern layaway). Want customers to choose their own deposit or number of payments? Pick a Flexipay template and they’ll choose on the Paythen plan page, within the limits you set.
Preview it before your customers do
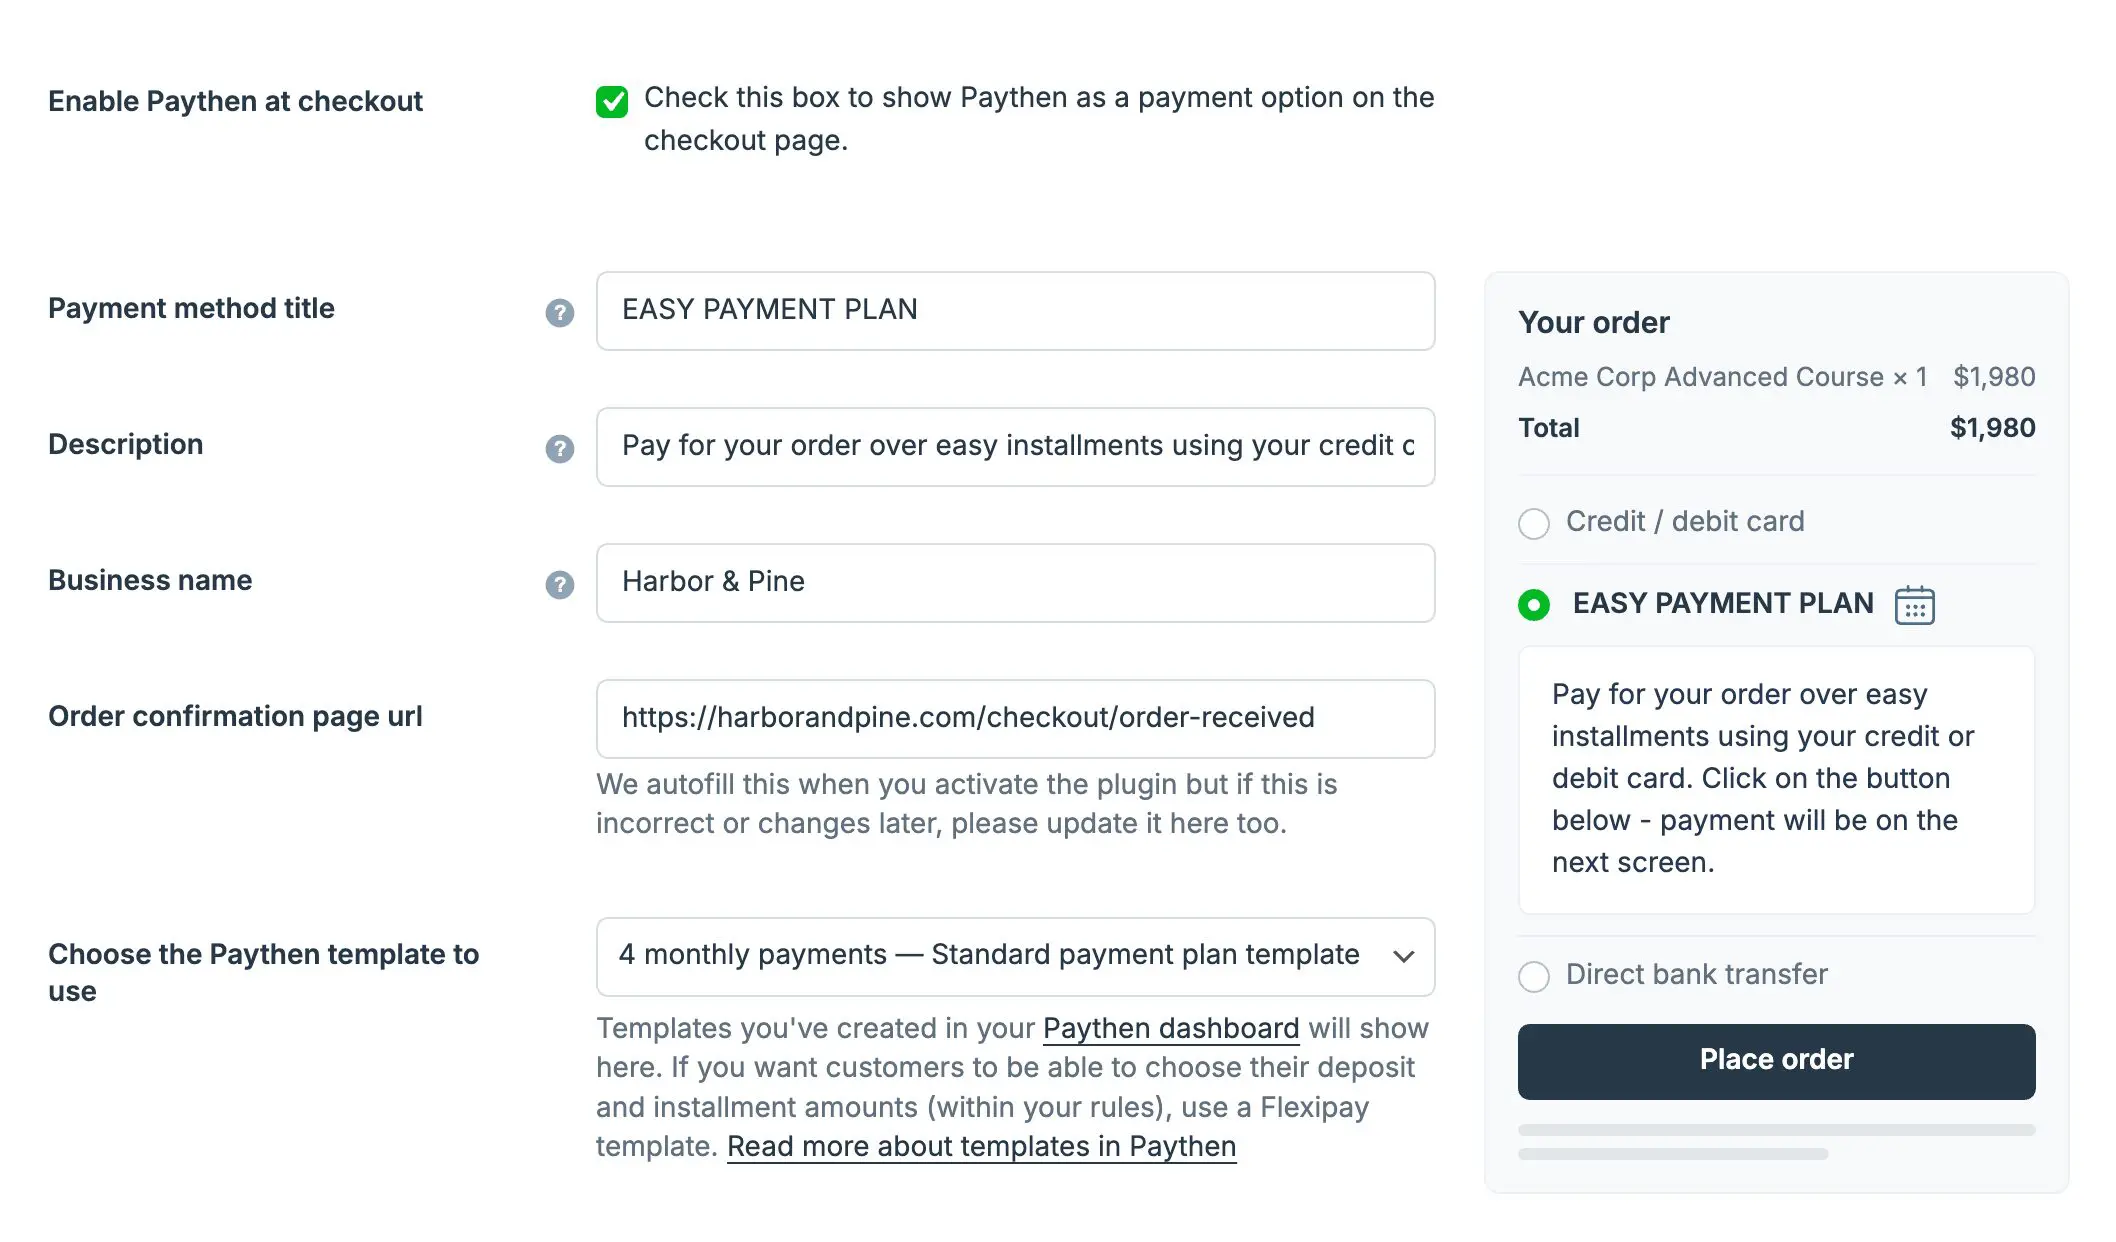
The settings page has a fresh look, with a live preview beside your payment method title and description showing exactly how Paythen will look at checkout with your text and changes.
Automatically connected to your Paythen account
Behind all this, your store now connects to your Paythen account in one click, with no API keys or template links to copy. Your templates sync automatically, so a new template shows up in your WooCommerce settings without any copying and pasting.
Updating from an earlier version
Download v1.0 and upload it in Plugins > Add New Plugin > Upload Plugin, choosing to replace your current version. Then click Connect to Paythen on the Paythen settings page straight away: Paythen is hidden at checkout until your store is connected.
Your settings, template links and product rules are kept. The old checkout options that let customers choose their deposit or number of installments are removed, so if you used them, switch to a Flexipay template or stay on the older version – let us know though!
As always, we’d love to hear what you think. If you have questions or feedback, reach out via the chat icon 💬
👉 Download the WooCommerce plugin v1.0
👉 WooCommerce Paythen integration setup guide